
51 hidden gems located outside of Indianapolis
Here’s a curated list of 51 hidden gems located just outside of Indianapolis that are perfect for exploration.

Latest models: Newer smartphones like the iPhone 15, Google Pixel 8, or Samsung Galaxy S23 Ultra come equipped with advanced camera capabilities, including 4K video recording, multiple lenses, and image stabilization.
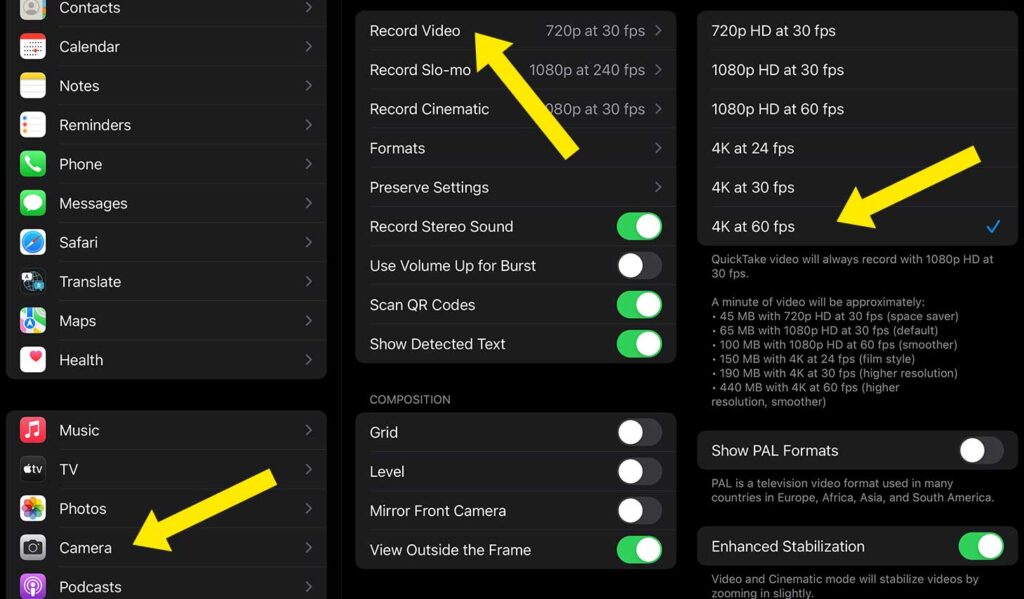
Resolution: Shoot in at least 1080p HD or 4K resolution to ensure high-quality footage.
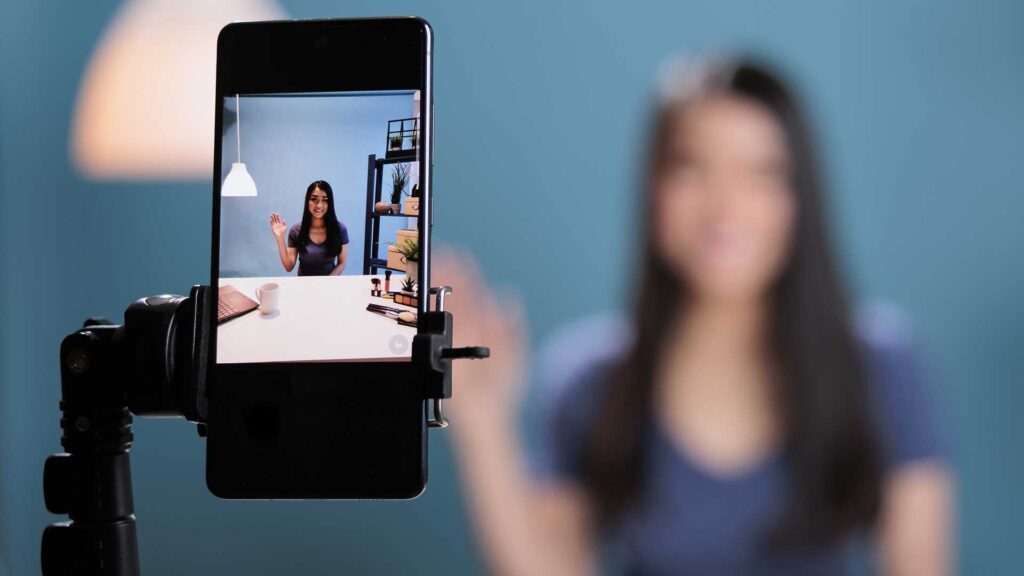
Use a tripod: A stable shot is essential for professional-looking videos. Invest in a small, portable tripod or a phone mount to keep your footage steady.
Gimbals: If you need to move while shooting, consider using a gimbal like the DJI Osmo Mobile. It helps reduce camera shake and allows for smooth, cinematic movements.
DIY stabilization: If you don’t have access to a tripod, prop your phone against a solid surface or hold it with both hands close to your body to minimize shaking.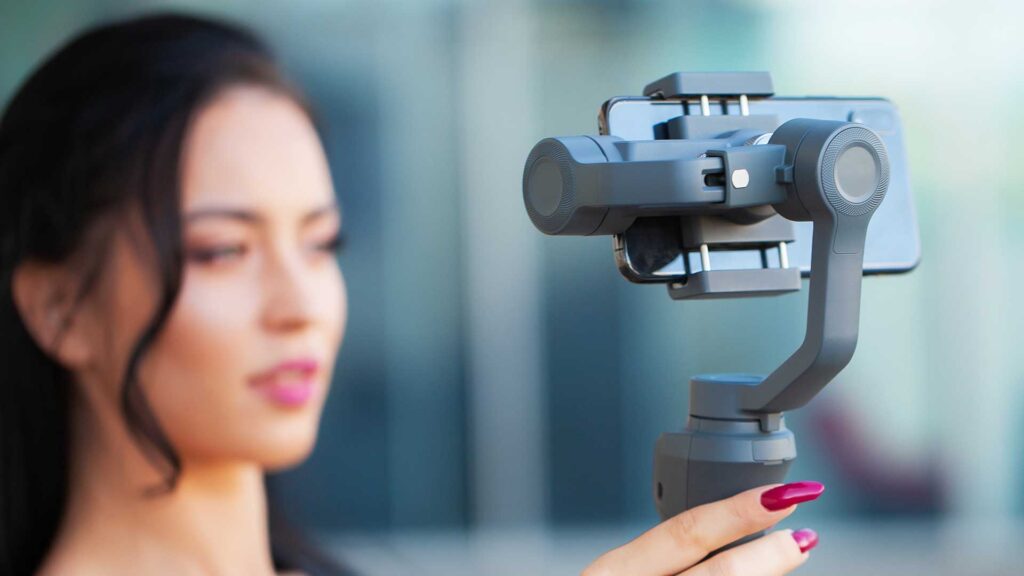
Natural light: Shoot during the day and use natural light from windows or shoot outside during golden hour (shortly after sunrise or before sunset) for the best lighting. Avoid harsh midday sunlight, which can create unwanted shadows.
Supplemental lighting: For indoor shoots or low-light conditions, use affordable LED lights or a ring light to brighten your subject. Smartphone clip-on lights are another great portable option.
Three-point lighting: Use a three-point lighting setup with a key light (main light), fill light (to reduce shadows), and backlight (to separate the subject from the background) for a professional look.

External microphone: The built-in microphone on smartphones is often not high quality. Use an external microphone like a lavalier mic, shotgun mic, or wireless Bluetooth mic for clearer sound. Plug it into the headphone jack or via an adapter.
Control background noise: Shoot in a quiet location and, if possible, use a foam windscreen on your mic to reduce wind noise when filming outside.
Test audio levels: Before shooting, test your audio to ensure the microphone is picking up your voice clearly without distortion or background noise.

Rule of thirds: Use your phone’s gridlines to follow the rule of thirds—position your subject at one of the intersections of the gridlines to create a balanced and visually pleasing composition.
Avoid zooming: Instead of using digital zoom (which reduces quality), physically move closer to your subject for sharper details. Most smartphones have wide-angle and telephoto lenses you can switch between for different shot types.
Focus on the subject: Tap on your phone’s screen to lock focus on your subject. Most smartphones also allow you to adjust exposure by swiping up or down after locking focus.

Manual controls: Many smartphones have manual settings within their native camera app or third-party apps like FiLMiC Pro or Moment Pro Camera. These allow you to adjust exposure, ISO, shutter speed, and white balance for better control.
Adjust white balance: Make sure colors look natural by adjusting the white balance to suit your lighting conditions. Most phones have presets like “Daylight” or “Tungsten” to help with this.
Lock exposure: Avoid inconsistent lighting by locking the exposure when shooting. This prevents the phone from automatically adjusting to bright or dark areas during filming.
Slow-motion videos: Many smartphones now offer slow-motion video recording, which can add a dramatic effect to your footage.
Time-lapse: For long processes, like sunsets or cityscapes, use the time-lapse feature to condense the footage into a short, engaging clip.

Higher quality: The back camera generally has a higher resolution and better features compared to the front camera. Use it for all primary shots, even if it makes framing more difficult.
Selfie screens: Some smartphones have screens on both sides to help frame the shot when using the back camera, but if yours doesn’t, consider using a mirror or a second phone to monitor the frame.
Mobile editing apps: Use apps like Adobe Premiere Rush, LumaFusion, or iMovie for basic to advanced editing directly on your phone. These apps offer trimming, color correction, transitions, and even motion graphics.
Add music and effects: Many editing apps come with royalty-free music and sound effects. Select tracks that enhance your video without overpowering the visuals.
Color grading: Adjust the color tones of your footage for a consistent and polished look. Use LUTs (Look-Up Tables) or manual color correction features available in editing apps.
Vertical video: For platforms like TikTok, Instagram Stories, and Reels, shoot in vertical mode (9:16 aspect ratio). For YouTube or Facebook, stick to horizontal (16:9 aspect ratio).
Captions: Many people watch videos without sound, so adding captions is essential for accessibility and to keep viewers engaged.
Thumbnail and Title: Create an attention-grabbing thumbnail and title, especially if you’re uploading to YouTube. Thumbnails should be clear and visually engaging to attract clicks.
Pre-plan your content: Before shooting, outline your video’s purpose and message. Decide on the structure—whether it’s a product showcase, educational tutorial, or testimonial—and stick to a script or storyboard to stay on track.
Engage early: Capture viewers’ attention within the first few seconds by introducing the main idea or hook of your video right away.
Try different settings: Experiment with your phone’s features, like HDR (High Dynamic Range), portrait mode for depth of field, and slow-motion or hyperlapse effects to add variety to your videos.
Learn from mistakes: Don’t be afraid to try different angles, lighting setups, and editing techniques. With each project, you’ll improve your skills and discover new ways to maximize your phone’s capabilities.
Here’s a curated list of 51 hidden gems located just outside of Indianapolis that are perfect for exploration.
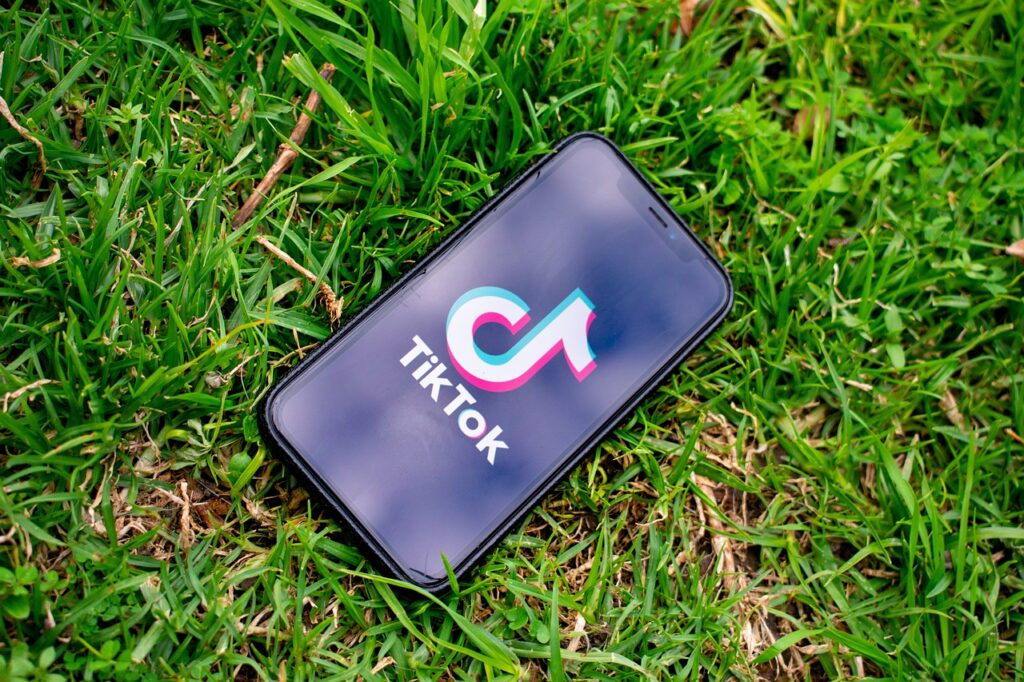
Here are some tips on how to use video production to market on TikTok:

Corporate video production involves creating video content commissioned by a business or organization.

Promoting your business with video in Indianapolis, Indiana can be highly effective given the city’s dynamic and diverse market.
In today’s digital age, businesses are constantly seeking innovative ways to capture the attention of their target audience and stand out from the competition.
Promoting your business with video in 2025 will continue to be a powerful way to engage audiences and expand your reach.